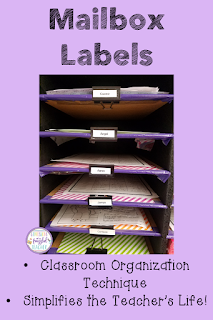
Do you have classroom mailboxes? Are you getting frustrated that you cover the students' names and don't know which box belongs to which student? Try this Teaching Tip: Use Binder Clips for Your Mailboxes.
Disclaimer: This post contains affiliate links. Using them will not cost you anything but may earn me a commission if you make a purchase.
The Problem...
My dad made me a beautiful set of mailboxes for my classroom. They are made from wood so they are super durable. I used to put labels on the bottom of the shelf with the students' names. In theory, this was a great idea. All my mailboxes were nicely labeled. In practice, however, this turned into a nightmare. I would always end up covering up the names with papers. This turned my easy task of passing out work into a HUGE nightmare.
The Solution...
I solved this problem in a cheap, easy way. I took medium sized binder clips and put them on the ends of each row. Then I took my handy, dandy label maker and created a label for each student.
Truthfully, the binder clips were a bit of a pain to put onto the mailboxes. It was a TIGHT fit! However, once it is done once, they do not need to be redone...EVER! I just remove the tape with the old student's name and replace it with a new one.
Label Maker Extraordinaire!
I am OBSESSED with my label maker. In fact, I love mine so much that I actually have two, one for school and one for home. You never know when you will have an label making emergency!The one below is the exact one (or two) that I have. I find that the labels look like they have a permanent hold on things. However, they also peal off easily, like from binder clips. It's the best of both worlds.


No comments:
Post a Comment